Honey Soap Recipe
Today, I am going to be demonstrating how to make my honey soap recipe. Within this soap recipe tutorial, not only will you be learning how to make a wonderful all natural honey soap scented with a delightful pure and natural essential oil blend, but you will also learn how to incorporate cosmetic honey into any soap batch that you choose.
Honey is a great natural additive that will add lots of benefits to your finished product. Keep in mind, however, that incorporating this ingredient into your batch can be a bit tricky. There are indeed specific tips and tricks to remember when adding honey to soap. All will be explained thoroughly within this tutorial!
This honey soap recipe batch is scented with a wonderful blend of lemon 5x essential oil and orange 5x essential oil giving your finished product a sweet honey-citrus aroma. This is definitely a very nice spring/summertime soap!
Today's recipe will make 5 pounds of finished product and will work perfectly with our 5 pound acrylic log soap mold, 5 pound acrylic slab soap mold or 5 pound wooden soap mold. Which one you use is up to you!
As usual, there will be plenty of pictures within this tutorial demonstrating each step.
Below is a picture of the finished product...
Below you will find the precise honey soap recipe formula that we will be using:
- Olive Oil (Grade A) = 23.85 Ounces (45% of total oils)
- Coconut Oil (76 Degrees) = 11.10 Ounces (21% of total oils)
- Almond Oil, Sweet = 9 Ounces (17% of total oils)
- Palm Kernel Oil = 4.24 Ounces (8% of total oils)
- Castor Oil = 2.65 Ounces (5% of total oils)
- Babassu Oil = 2.12 Ounces (4% of total oils)
- Lemon, 5X Essential Oil = 45 grams (1.58733 Ounces)
- Orange, 5x Essential Oil = 30 grams (1.05822 Ounces)
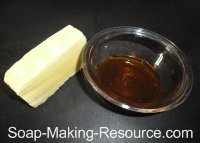
- Honey = 3 ounces
- Distilled Water = 2 ounces (for honey dilution)
- Distilled Water = 15 ounces (for lye solution)
- lye = 7.54863 ounces (214 grams)
* This recipe has a 5% super-fat.
* All measurements are weight measurements, not liquid measurements.
Below is the step by step process for making my honey soap recipe...
Step 1) First, we are going to create our lye solution. Carefully weigh out exactly 214 grams of dry lye into a heat and chemical safe container.
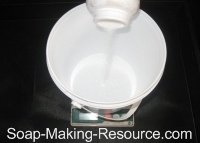
When weighing out our lye portion, I always like to measure using grams rather than ounces as this smaller unit of measure is much more accurate.
Next, measure out your distilled water portion into a heat and chemical safe container. To create our lye solution for this honey soap recipe, we will need exactly 15 ounces of distilled water. Remember to measure out your water portion using weight ounces, not liquid ounces. Also, be sure to use distilled water here, not faucet or bottled water.
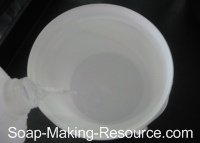
For a 5 pound soap batch, we would typically use about 20 ounces of distilled water to create our lye solution. For this honey soap recipe, however, we are discounting our water portion to only 15 ounces because we will be adding 5 more ounces of liquid to the batch in a later step when we incorporate our honey portion. It is vital to discount your liquid portion within the lye solution when making honey soap or else your batch will likely have too much liquid and possibly not set up properly.
|
Sign Up Today!
*Your information is SAFE with us! |
Within this honey soap recipe, we will be incorporating 3 ounces of Soap Making Resource's cosmetic honey, which is considered to be a liquid within our formula, diluted in 2 ounces of warm distilled water. This additional 5 ounces of total liquid will make up for the discounted water portion within our lye solution.
Keep in mind that because of the water discount, this lye solution will have a strong solution strength and, therefore, be highly caustic. Remember to be exceedingly cautious when handling this ingredient.
Now, pour your pre-measured portion of dry lye into the distilled water portion while stirring with a heat and chemical safe mixing utensil. As you can see in the picture below, I personally like to use a silicone spatula for mixing my lye solution.
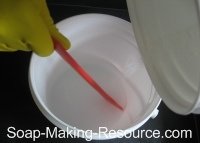
Keep in mind that as you combine the lye and water, your liquid will begin to heat up and a strong fume will be present. Don't breathe in these fumes! You should always create your lye solution in a well-ventilated area away from children and pets.
At this point, your lye solution has been successfully created. Now place a thermometer into the solution and set it safely off to the side to cool.
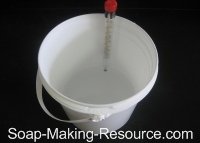
Because we are incorporating cosmetic honey into this batch, we are going to allow our lye solution to cool down to a lower temperature than normal. Honey will have a tendency to cause your soap batch to overheat, which typically causes oil separation, so it is vital to keep your ingredient components cooler than normal. Allow your lye solution to drop in temperature to around 80 degrees Fahrenheit before using it within your batch.
Step 2) Next, we are going to weigh out our soap making oils according to our honey soap recipe formula as explained above. Weigh out the oils into your stainless steel soap making pot.
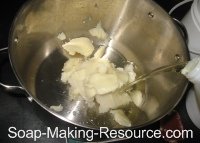
Now melt your oils down using a low heat setting on your cook top burner. Always remember that oils are very easy to scorch and are also highly combustible, so be sure to use a low heat setting and monitor the oils constantly while they melt!
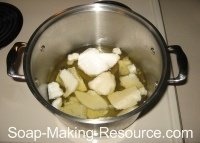
Step 3) While our oils slowly melt, we are going to prepare the additives needed for this batch. For this honey soap recipe, we will need to prepare our citrus essential oil blend and honey portion.
In separate containers, measure out 45 grams of Soap Making Resource's lemon 5x essential oil and 30 grams of Soap Making Resource's orange 5x essential oil.
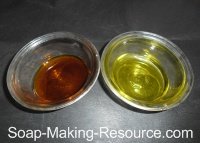
I like to measure out my essential oils for an essential oil blend in separate dishes like this so that if I accidentally over measure one of the oils, I can easily draw out the excess product using a pipette. Of course, this would be impossible if I was measuring the essential oils directly into one another. Also, for our essential oils, we are measuring in grams because, again, this smaller unit of measure is more accurate than measuring in ounces!
Now that each essential oil within our blend is weighed out, combine them all into one dish so that they are ready to quickly incorporate into our batch when the time is right.
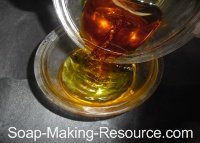
Next, we are going to prepare our honey portion. Measure out 3 ounces of Soap Making Resource's cosmetic honey into a separate container. Remember that these are weight ounces, not liquid ounces.
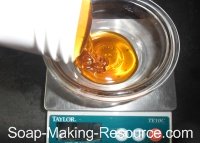
Now we are going to dilute our honey with warm distilled water so that this viscous ingredient is easier to pour into the batch and incorporate when we add it to our batch. Weigh out 2 ounces of warm distilled water to be used for the dilution.
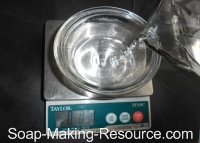
Now pour the warm water into your honey portion and mix thoroughly.
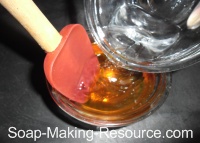
Diluting the honey is vital for the easy incorporation of this ingredient into your batch. If you don't dilute your honey portion, it can be very difficult to thoroughly mix this ingredient into your soap and consequently you may be left with dark honey spots that are spread sporadically throughout your finished product.
In total, the honey and distilled water that we used for dilution, will add about 5 ounces of liquid to our batch. Keep in mind that I do consider the honey itself to be a part of our liquid portion, even though it is highly viscous.
Remember, this extra liquid portion is accounted for in our formula as we had substantially discounted our water portion when creating the lye solution in anticipation of this additional 5 ounce of liquid being added to the batch. If we used as much water as we normally would to create the lye solution for a 5 pound batch, this extra 5 ounces of liquid would have caused our honey soap recipe to have too much total liquid.
When making a honey soap recipe, adding too much liquid to the batch is a common error that many new soap makers make. Too much total liquid within your recipe can cause the finished product to be overly soft and have an unappealingly low lather. In extreme circumstances your soap may not even set up when your recipe formula has too high of a liquid portion. It is integral that you discount your water portion, at least slightly, in anticipation of this extra liquid being added to the batch.
Step 4) While we were preparing our citrus essential oil blend that we will be using within our honey soap recipe and measuring out and diluting our honey portion needed for this batch, our soap making oils have most likely melted down completely. If they have completely melted, remove your soap making pot from the cooktop burner and place a thermometer into the mixture. We want the temperature of our oils to drop in temperature to around 80 degrees Fahrenheit.
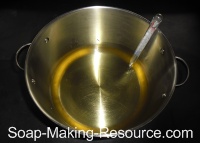
Like our lye solution, we are allowing the temperature of our oil mixture to cool down to a lower temperature than we would normally recommend for most other recipes. We are doing this so that we can keep this batch as cool as possible as the addition of honey into a soap recipe can easily cause overheating which usually results in oil separation. Keeping your ingredient components somewhat cool is a simple way to help combat this troubleshooting issue that is all too common when making a honey soap recipe.
By now your lye solution has probably cooled down substantially, but it may not have dropped to 80 degrees Fahrenheit just yet. Your oil mixture is definitely way too warm as it has just been removed from your cooktop burner. To cool these two ingredient components, simply place each vessel in a sink filled with ice water as demonstrated in the picture below.
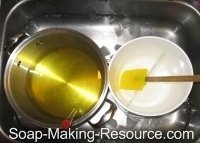
Now simply monitor the temperature of each solution and once they reach your desired temperature, remove them from the ice water bath.
Step 5) At this stage, your honey portion and your citrus essential oil blend has been prepared and is ready to be added to the honey soap recipe batch when the time is right and your oil mixture and lye solution has been cooled to the appropriate temperature. We are finally ready to make soap!
Carefully pour the lye solution into the soap making oils while stirring manually with a heat and chemical safe mixing utensil. Don't forget to wear all the appropriate safety equipment when making soap!
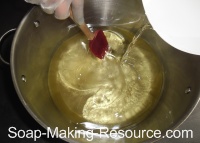
Keep stirring your soap pot contents manually until you reach an even texture and color.
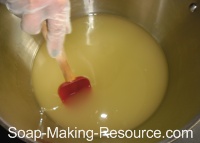
Next, pour in your citrus essential oil blend.
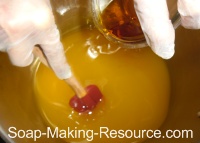
Once again, stir your honey soap recipe batch until you reach an even texture and color.
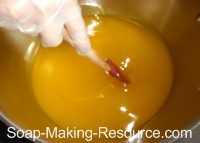
Now, pour your pre-measured honey portion that has been diluted in distilled water into this batch.
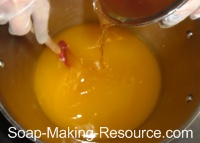
After the honey is added to your batch, once again, mix your soap manually to incorporate the honey until you achieve an even texture and color.
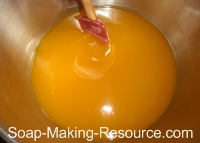
It is important to initially mix your soap manually after you add the honey as honey has a tendency to increase trace substantially. If you start mixing your soap with a stick blender prematurely, your batch may begin to solidify too quickly, which, in a worst case scenario, will result in your batch being stuck in the pot with no way to transfer the "soap batter" into your mold.
It is always a good idea to test out how quickly your batch is going to trace by initially mixing your soap manually until you achieve an even texture and color. This is especially true when you are making soap using ingredients, like honey, that have a reputation for speeding up trace. Then, once you get a feel for how quickly your soap is thickening, if you want to speed things up a bit, you can start using a stick blender.
Since our batch is moving pretty slowly, at this point, we are going to begin mixing our honey soap recipe with our stick blender until we reach a light trace. If you happen to have a multi speed stick blender, I recommend that you use the slowest speed!
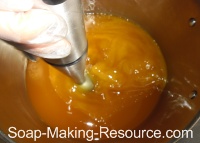
As the honey soap recipe begins to thicken, test the batch for trace. You can do this by dribbling a small amount of "soap batter" onto the surface of the rest of your batch. If the soap sets on top of the batch, even if just for a brief moment, before sinking back into the rest of the mixture, you have reached trace and your soap is ready to pour into a mold!
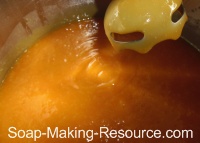
Step 6) Next, pour your honey soap recipe batch into a 5 pound soap mold. As you can see in the picture below, we are using Soap Making Resource's 5 pound no-line acrylic log soap mold.
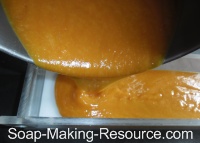
Due to the honey content within this recipe, you need to keep this batch cool and prevent the heat caused by the saponification reaction from building. Therefore, do not put a lid on your mold and do not insulate this batch! In fact, you can even surround your acrylic mold with ice for the first several hours after you pour in your soap to help keep your product cool and prevent overheating!
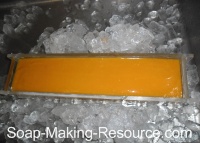
Step 7) Allow your soap to set for 12 - 24 hours or until the batch is hard enough to remove from your mold without damage. Due to the honey content, this batch will probably be a bit softer than what you may be used to, even though we discounted our water portion when making the lye solution.
If your soap is too soft and sticky to remove from your mold without damage, leave it in the mold for several days to allow some of the liquid content to evaporate, causing the soap to become harder.
Once adequately solidified, carefully remove the log of soap from your mold. As you can see in the picture below, it is very easy to remove soap from a Soap Making Resource no-line acrylic log soap mold. Simply slide the soap pushers underneath the mold and into the appropriate cavities, apply steady downward pressure and your soap will begin to slide right out of your mold without any damage!
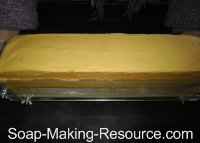
Step 8) Next, slice your newly formed soap log into individual bars. For this batch, we decided to use Soap Making Resource's wire soap loaf cutter, which will help us to cut our log of soap quickly and evenly with one smooth motion.
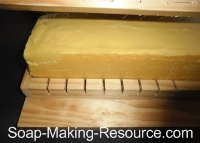
Alternately, you can use Soap Making Resource's guided soap cutter to manually cut each bar individually. Although the guided soap cutter will not cut your soap nearly as quick as the wire soap loaf cutter, this tool will allow you to cut your soap accurately and evenly at any thickness you desire up to 4 inches. The guided soap cutter can also be used with a wavy soap cutter blade to give your finished product a unique textured appearance.
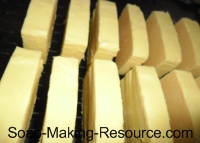
Step 9) Finally, set your honey soap bars on a rack to cure. Ideally, you should allow your soap to cure for about 4 - 6 weeks. This extended cure time will allow any excess water within your soap to evaporate, leaving you with a hard, long lasting product that offers a superb lather.
I hope that you all enjoyed this honey soap recipe tutorial with sweet citrus essential oil blend. The goal for this tutorial was to not only teach you how to make a wonderful specific honey soap, but to also demonstrate the method for incorporating honey into any batch of your choosing. I hope we accomplished that with this detailed tutorial! Honey, of course, is one of the oldest cosmetic ingredients on this planet and I hope that you try using it in your product manufacturing today!
If you are interested in learning more about using honey in a variety of bath and beauty manufacturing applications, be sure to view our honey oatmeal almond milk soap recipe and honey carrot facial mask recipe. I think you will enjoy these tutorials! Keep in mind also that Soap Making Resource is a supplier of top quality 100% all natural pure grade cosmetic honey from small 1 pound jars up to 60 pound 5 gallon pails. Click here to check out this great product now!
I hope that you will enjoy browsing soap-making-resource.com, your home for quality soap making supplies, equipment, and tutorials.

