Homemade Soap Recipe
In today's homemade soap recipe, we will be making a beautiful artisan winter soap bar with black walnut hull powder, all natural walnut milk and a wonderful warm winter essential oil blend of cinnamon leaf essential oil, clove bud essential oil, bay (rum) essential oil and black pepper essential oil. A nice hot shower with this moisturizing natural soap will be the perfect start for those icy winter mornings!
Never made soap with walnut milk before? Don't worry! Within this homemade soap recipe, you will learn exactly how to create a batch of all natural walnut milk and easily incorporate it into your batch!
Here is a picture of our final product:
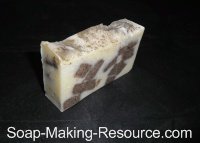
Within this winter soap recipe, we will be using a very cool embed design technique to give our soap a colored cube appearance. Styling your homemade soap recipe using this method is easy. We will simply be using black walnut hull to color the cubed portion of this homemade soap recipe producing a soap with a light brown hue. These colored cubes will then be embedded into our main cream colored soap batch. Finally, we will top this soap with natural walnut hull powder to give each bar both exfoliating properties and even more visual appeal. This soap will have a very unique rustic and warm design. Beautiful!
Our homemade soap recipe will make a 5 pound batch of soap. We will be using the Soap Making Resource 5 pound acrylic log mold to create our main batch. We will also need to use our 2 pound acrylic log mold to create the smaller black walnut hull colored soap portion that will be cut into our decorative colored soap cubes.
Of course, all ingredients are also available to purchase in bulk, right here at soap-making-resource.com.
Below you will find the exact homemade soap recipe that we will be using to create our winter soap batch. Keep in mind that our styling technique will actually require us to make two separate batches of soap here, so below, you will see two separate recipes.
The two soap recipes will actually have the same oil and lye proportional formulas, but are two different batch sizes; the first being 2 pounds and the second being 3 pounds. The differences between the two recipes will be the addition of black walnut hull powder into the smaller batch to create a brown colored soap and also the addition of fresh homemade walnut milk into the same 2 pound recipe which will be used as our liquid portion when creating its lye solution. We will also omit the essential oil blend from this smaller batch as it will only be added to the larger 3 pound recipe.
The small portion of black walnut hull colored soap, of course, will then be cut into tiny cubes and added to our 3 pound soap. Once our winter soap recipe is complete, and both batches are combined, we will have 5 pounds of soap total.
For your convenience, we are displaying both recipes so that you won't have to take the time to resize the formula for the two separate batches.
|
Sign Up Today!
*Your information is SAFE with us! |
Batch #1 = 2 pounds
Note:
This batch will be colored with black walnut hull to later be cut into cubes and embedded within our main batch. We will not be adding our essential oil blend to this batch, but instead will incorporate the essential oils into our main 3 pound batch that will be poured over our brown soap chunks.- Olive Oil = 10.5 Ounces (50% of total oils)
- Coconut Oil (76 Degrees) = 4.2 Ounces (20% of total oils)
- Palm Oil, RBD = 3.15 Ounces (15% of total oils)
- Avocado Oil = 1.68 (8% of total oils)
- Babassu Oil = 1.05 Ounces (5% of total oils)
- Castor Oil = .42 Ounces (2% of total oils)
- Black Walnut Hull (Powder) = 2 teaspoons (7 grams)
- Walnut Milk = 8 ounces
- lye = 2.944 ounces (83 grams)
*This recipe has a 5% super-fat.
*All measurements are weight measurements, not liquid measurements.
Note: This batch will actually produce a total of 5 pounds of soap once the black walnut hull colored chunks are added to it, so be sure to have a 5 pound mold prepared, not a 3 pound mold! We will also be adding our winter essential oil blend, as described below, to this batch.
- Olive Oil = 16 Ounces (50% of total oils)
- Coconut Oil (76 Degrees) = 6.4 Ounces (20% of total oils)
- Palm Oil, RBD = 4.8 Ounces (15% of total oils)
- Avocado Oil = 2.56 (8% of total oils)
- Babassu Oil = 1.6 Ounces (5% of total oils)
- Castor Oil = .64 Ounces (2% of total oils)
- Clove Bud Essential Oil = 28 grams
- Bay (Rum) Essential Oil = 21 grams
- Cinnamon Leaf Essential Oil = 18 grams
- Black Pepper Essential Oil = 8 grams
- Distilled Water = 12 ounces
- lye = 4.486 ounces (127 grams)
- Black Walnut Hull Colored Soap Chunks = 2 Pounds
- Black Walnut Hull Powder = Several grams to sprinkle on top of finished soap.
*This recipe has a 5% super-fat.
*All measurements are weight measurements, not liquid measurements.
Below is the step by step process for creating our winter homemade soap recipe:
First we are going to create our 2 pound batch of black walnut hull colored soap. Keep in mind that you should do this at least 1 day before creating your main batch so that this soap portion has plenty of time to harden. Remember, this batch will be cut into small cubes and added to our main batch of soap for decoration. In order to cut your soap successfully, it must be fully solidified! Of course, this batch of soap doesn't have to be fully cured, just solid enough to cut into small cubes. It will have plenty of time to cure while it is embedded into our main batch!
Step 1) Our very first step is to create the walnut milk that will be used to make the lye solution for our homemade soap recipe. Making walnut milk is easy! First, weigh out 4 ounces of small walnut pieces.
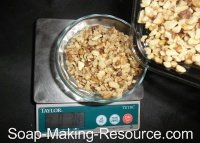
Next, weigh out 12 ounces of distilled water.
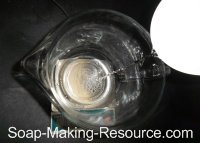
Remember, this walnut milk will be used within your soap recipe, so be sure to use distilled water when producing it. It is highly recommended when making any type of homemade bath and beauty product that you use distilled water, not faucet or bottled water.
Keep in mind that 12 ounces of distilled water will actually produce more walnut milk than what we need for our homemade soap recipe. I always like to produce a bit more than what is needed for my recipe to be sure that I have enough milk. When producing vegan milks, some of the water portion is inevitably soaked up by the walnut pulp, so if you were creating the milk with exactly 8 ounces of water, it would yield too little walnut milk for our recipe.
Next, combine this 1 to 3 ratio of walnuts to water into a single container.
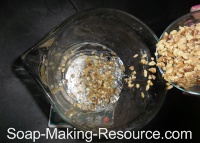
Now, using your stick blender, thoroughly blend these two components together. You will see that within seconds, your liquid will start to turn a white creamy hue.
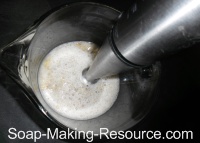
Alternatively, you can use your home blender for this step if you prefer. I personally like using my stick blender when mixing nut milks as it allows me to produce milk batches that are too large for my blender. Plus, it's one less dish to clean. That's always a good thing!
Once your walnut and water combination is mixed thoroughly, filter out the walnut pulp. Keep in mind that at this point, your walnut milk should have been mixed thoroughly enough so that there are no large walnut chunks left within your mixture. You should only be left with a fine walnut pulp.
I like to filter my walnut milk through an unused paint strainer bag. If you prefer, you can also use cheese cloth for this step.
Slowly pour your walnut milk and pulp into your filter of choice. As you can see in the picture below, my paint strainer bag fits perfectly over the container, making it very convenient and simple to use for our filtering process. A paint strainer bag is basically a cheese cloth in bag form and they are just wonderful to use for this walnut milk making process.
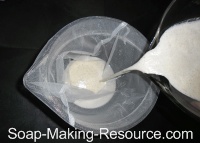
Next, lift the filter up and squeeze out the milk. It's just like milking a cow!
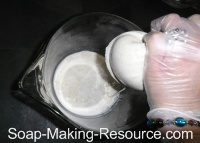
The more you squeeze the more walnut milk you will yield. By the time you are finished squeezing, you should be left with a relatively dry walnut pulp within the bag
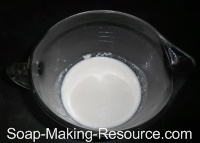
As you can see below, we produced a lot of beautiful smooth vegan milk that is full of skin nourishing walnut fat. You will love this ingredient in your product!
Step 2) Next, we are going to create our lye solution for this two pound batch. Carefully weigh out 83 grams of dry sodium hydroxide into a chemical safe container.
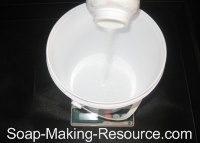
I always like to measure my lye portion in grams as this small unit of measurement is much more accurate than measuring in ounces. If you must measure in ounces, however, be sure to weigh out 2.944 ounces as accurately as possible.
Next, measure out 8 ounces of the fresh walnut milk that you just created. We will be using walnut milk within this 2 pound soap batch as the liquid portion for our lye solution.
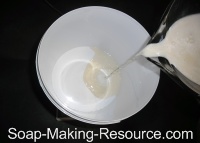
Now pour the dry lye into your walnut milk portion and stir it in using a silicone spatula.
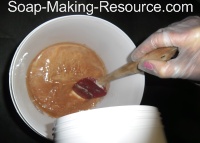
When combining your lye and walnut milk, a few interesting things will happen. First of all, there will be a somewhat pleasant toasted walnut aroma present when these two components are combined. Don't breathe this in, no matter how tempting! Despite the agreeable scent, there are still lye fumes present that should not be inhaled. Be sure to follow your standard safe lye solution making procedures as usual despite the change in scent.
Secondly, your lye solution will turn a dark reddish brown when made with walnut milk. This is perfectly normal, so don't panic! In fact, finished soap made with a walnut milk lye solution will have a tannish brown color.
Finally, there will be a noticeable separation that will occur within the lye and walnut milk mixture. This is also perfectly normal and will in no way affect your batch!
Now that your lye solution is successfully created, place a thermometer into the mixture and place it safely off to the side for future use. We want this solution to drop in temperature to below 110 degrees Fahrenheit.
Step 3) Next, we are going to measure out and melt our soap making oils for the 2 pound portion of our winter soap recipe. I recommend that you weigh the oils out into your stainless steel soap making pot. Remember, the homemade soap recipe formula for this 2 pound portion is provided above. Be sure to follow it exactly!
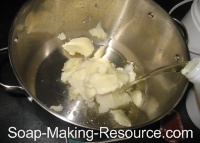
Now that the oils are successfully measured out, melt them down using a very low heat setting on your cooktop. Remember to keep the heat low! You don't want to burn your soap making oils!
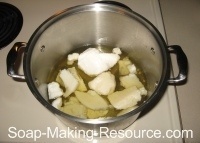
Step 4) While the oils are melting and our lye continues to cool down, we are going to prepare the additives for the 2 pound portion of our homemade soap recipe.
The only additive that we will be incorporating into this smaller batch is black walnut hull powder. Remember, this portion of soap is being created simply so that we can slice it up into chunks and use them as decorative embeds for our main batch, so we are going to keep things simple. The winter essential oil blend that we will be using to scent our finished product will be added to the main 3 pound batch portion.
Weigh out 7 grams (approximately 2 teaspoons) of black walnut hull powder into a small dish.
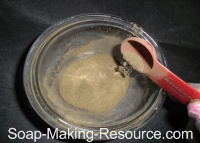
Set it off to the side so it is ready to be incorporated into our batch when the time is right.
Step 5) At this point, your soap making oils have more than likely melted in full. Remove them from your burner and place a thermometer into the mixture. Set the hot oils safely off to the side to cool. Our soap making oils will need to drop in temperature to below 110 degrees Fahrenheit for use in this homemade soap recipe batch.
By now, your lye solution has probably cooled down quite a bit. For use in this homemade soap recipe, your lye solution should also cool to below 110 degrees Fahrenheit just like the oils.
If you need to cool down your lye solution and oils mixture, you can place the lye and oils containers in a sink filled with ice water.
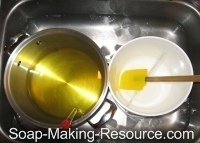
More than likely, you will need to do this only for your soap making oils as your lye solution has probably already cooled in temperature to below 110 degrees Fahrenheit on its own.
Step 6) At this point, your lye solution and oils have cooled to your desired temperature and your black walnut hull additive has been measured out and is ready to be added to your batch. We are finally ready to make soap!
Carefully pour your walnut milk lye solution into your soap making oils and stir manually using a chemical safe mixing utensil.
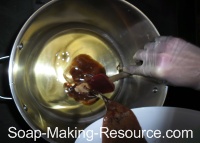
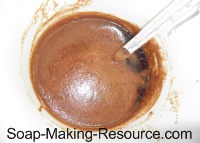
As you can see in the picture above, your oils will almost immediately start to turn a chocolate brown hue as the two components are combined. This change in color is due to the walnut milk content within our lye solution.
Stir your lye and oils together manually, at first, until you achieve an even texture and color.
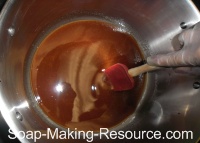
Once an even texture is achieved within your batch, we are going to incorporate black walnut hull powder into this homemade soap recipe. When incorporating herbal powders into soap, I like to separate a small amount of the soap "batter", about 1 - 3 ounces, into a small container and then mix the powder into this separated portion.
I do this so that I can ensure that I have enough time to thoroughly mix all the powder into my batch. Sometimes, if you pour the powder directly into the main batch, instead of using the method as described above, the soap can reach a thick trace requiring that you pour the batch into your mold before all the powder is thoroughly integrated. This can leave you with unwanted colorant "chunks" within your product.
Simply pour a few ounces of soap into a small heat and chemical safe container.
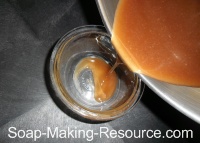
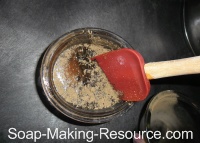
Then, thoroughly mix the black walnut hull powder into this small soap portion. Be sure to keep mixing until all the colorant chunks are incorporated and you achieve a smooth texture and even color.
Now, pour this black walnut hull colored soap into your main batch and mix it in thoroughly.
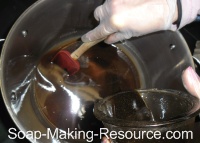
As you can see in the picture above, your soap will start to turn a beautiful dark chocolate brown color. Gorgeous!
Now, start mixing the batch with your stick blender to help speed things up a bit.
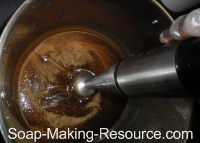
Keep mixing until you reach trace. Remember, you can test for trace by dribbling a small portion of your soap onto the surface of your main batch. If the soap sets on top of the soap "batter", even if just for a brief moment, before sinking back down into the rest of the mixture, you have reached trace.
Step 7) Finally, pour your soap into your 2 pound Soap Making Resource acrylic log mold.
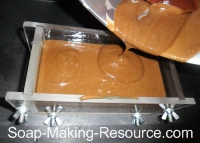
Step 8) Allow this soap to set in the mold for 12 - 24 hours, or until fully hardened. Remember, this 2 pound black walnut hull batch was created with the sole purpose of being cut up into small cubes which will later be embedded within our main batch for decoration. The longer you allow this soap to set, the harder it will be and consequently the easier it will become to cut our embed pieces. If not allowed to set for a long enough period of time, your soap will be gooey and soft, making it hard to cut successfully. If possible, you should create this batch as far in advance as possible to allow ample time for it to harden before cutting.
So, it is at least a day later and we are ready to begin making our second batch of soap; this one being a 3 pound recipe. It is important to wait at least a day between batches as you need to allow ample time for the 2 pound batch, colored with black walnut hull, to harden as we will be cutting this into embed pieces a little bit later and adding it to our 3 pound batch to complete our 5 pound homemade soap recipe.
Remember, this second batch will be a 3 pound formula, but keep in mind that once the soap embeds are added, it will produce a finished product weighing 5 pounds.
Step 1) First we are going to create our lye solution for this 3 pound homemade soap recipe formula that will be used to complete the 5 pound batch. Carefully measure out 127 grams of dry lye.
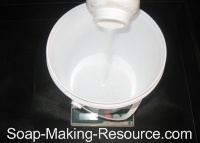
Next, measure out 12 ounces of distilled water into a chemical and heat safe container.
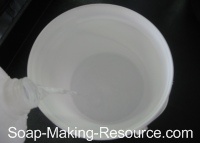
Unlike the 2 pound recipe portion that we created earlier, we will be making this lye solution using distilled water, not walnut milk. We want this portion of soap, which will be used as the background behind our black walnut hull colored soap embeds, to be a very nice creamy white color for styling purposes. Lye solutions made with walnut milk will actually turn the soap a tan color, which for this project, we do not want. Trust me, the light white hue and dark brown chunks contrast very well with one another and makes for a very attractive looking product!
Finally, pour the dry lye into the distilled water and stir the mixture until the lye has completely dissolved.
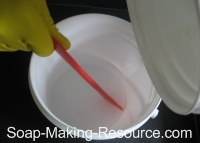
Remember to avoid breathing in the fumes that will be present during this process and be sure to keep the kids and animals out of the room!
Now, place a thermometer into the lye solution and set it safely off to the side for future use. We want the temperature of our lye to fall below 110 degrees Fahrenheit for use in this homemade soap recipe batch.
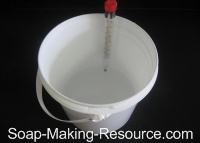
Step 2) Next, we are going to measure out and melt down the soap making oils according to the 3 pound homemade soap recipe formula as described above. Measure the oils out into your stainless steel soap making pot.
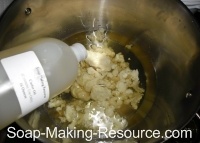
Now melt them down to liquid form using a low heat on your cooktop burner.
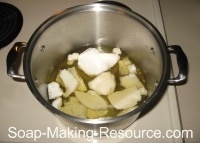
Step 3) While the oils are melting and the lye solution continues to cool down, we are going to prepare the additives needed for this homemade soap recipe.
First, we are going to prepare our soap chunk embeds. Remove the 2 pound black walnut hull colored soap portion that you had created the previous day from the mold.
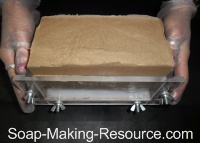
As you can see above, removing your soap from a no-line Soap Making Resource acrylic soap mold is easy!
Simply place your mold on top of the pusher stands, apply a steady downward pressure and your soap will easily pop right out of your mold. You can check out the video on this page to learn more about Soap Making Resource's no-line soap molds!
Now cut this brown soap into small square chunks.
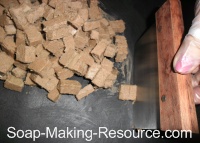
We will be using all 2 pounds of these soap chunks within this recipe. Embedding these black walnut hull colored soap chunks into our 3 pound recipe formula will cause this batch to make 5 pounds of finished product!
Next, we need to prepare our essential oils. In separate containers, weigh out 28 grams of clove bud essential oil, 21 grams of bay (rum) essential oil, 18 grams of cinnamon leaf essential oil and 8 grams of black pepper essential oil.
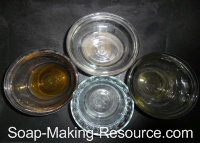
When preparing an essential oil blend, I personally like to measure out each essential oil into a separate dish. I do this so that if I happen to over measure a particular oil within my blend, I can always draw some out using a pipette. If I measured each essential oil all into one container, I would not be able to draw out a specific oil if I accidentally over poured.
Now combine all 4 essential oils into a single dish.
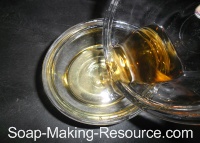
Step 4) While you were preparing your additives, your soap making oils have likely melted and your lye solution has dropped in temperature. Now, we need to cool down our oils and lye, if necessary, until they are both below 110 degrees Fahrenheit. You can use the same ice water bath method that we used when creating our 2 pound batch to cool the two solutions.
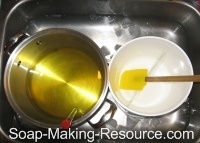
Step 5) At this point, our oils mixture and lye solution has cooled to our desired temperature and our additives are prepared to be incorporated into the batch when the time is right. We are finally ready to make soap and complete our homemade soap recipe!
Pour your lye solution into your soap making oils and stir the mixture with a heat and chemical safe utensil.
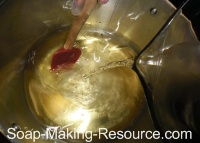
Keep on mixing until you achieve an even texture and color.
Next, pour in your essential oils.
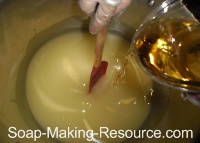
Once again, stir manually until the essential oils are thoroughly mixed into the batch.
Now, if necessary, begin mixing your batch with a stick blender.
Keep mixing until you reach a thin trace. Remember, you can test for trace by dribbling a small portion of your product onto the surface of the rest of your soap "batter". If the dribbled soap sets on the surface of the batch, even if just for a brief moment, before sinking back in, you have reached trace.
When making this particular soap, we actually did not need to use a stick blender at all as it started to thicken up very quickly after just a few minutes of stirring in my winter essential oil blend.
To be honest, this is extremely rare for me as a soap maker. I usually stick blend every batch, no matter what! This fast trace that we experienced may have been because of the temperature that we mixed our lye and oils at, or possibly because of the specific essential oils that we used within our blend.
Either way, we opted not to stick blend as it is vital to keep our soap somewhat thin before adding the black walnut hull colored embeds. We need plenty of time to work as we integrate the embeds into our soap. You certainly don't want your batch to seize up on you before all the embeds are added to the batch and mixed in properly. Also, it is much easier to mix the embeds into the soap when the batch is still somewhat thin.
Whether or not you decide to stick blend this batch is a judgment call that you'll have to make at the time of soaping. I recommend that you first mix manually for several minutes after adding the essential oils. If the batch remains thin after several minutes of stirring and no trace is achieved, go ahead and stick blend. Just be sure to stop mixing and check for trace often as you stick blend so your batch does not thicken up too much!
Finally, your soap has reached a thin trace, and we are ready to add our black walnut hull colored soap chunks! Add the embeds into your soap pot and stir them in.
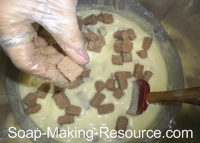
Remember, once you add your soap embeds, you won't be able to stick blend the batch anymore as stick blending will destroy the embeds! So, be sure to add the black walnut hull colored soap chunks only when you are completely done mixing the batch and you have reached a true trace.
Step 6) Now that all your black walnut hull soap chunks are added to your recipe and are fully mixed in, we are ready to pour our batch into a mold. Remember, with the addition of our soap embeds, this batch weighs a total of 5 pounds, so be sure to use a 5 pound soap mold. As you can see in the picture below, we are using the Soap Making Resource no line 5 pound acrylic log soap mold for this homemade soap recipe batch.
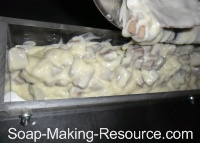
Step 7) Finally, we are going to add one more decorative flair to this batch. Lightly sprinkle some black walnut hull powder onto the surface of your soap. This addition will add a beautiful accent to the top of each bar and give the ends of your soap some gentle exfoliating properties. This step, of course, is optional, but I think it adds a nice final touch.
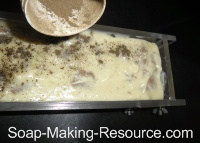
Step 8) Allow this homemade soap recipe to set for about 24 hours or until solidified enough so that you can remove it from the mold without damage and then push it out of your Soap Making Resource mold.
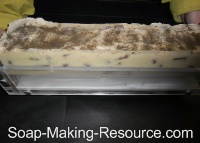
Once again, you can see just how easy it is to remove your soap from a Soap Making Resource acrylic no line soap mold.
Step 9) Next, cut this 5 pound loaf into individual bars. To accomplish this step, you can use the Soap Making Resource guided soap cutter, or the Soap Making Resource wire soap cutter. It's up to you! For this particular soap recipe, we decided to use our wire soap cutter to cut straight even bars.
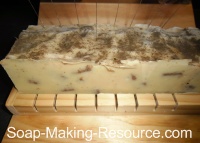
Step 10) Finally, place your finished soap bars on a rack to cure.
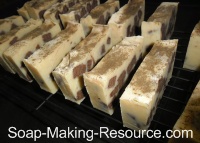
For best results, you should allow your soap to cure for at least 4 - 6 weeks. This extended cure time will allow the excess water to evaporate from each bar, making a harder, longer lasting product. Once your soap has sufficiently cured, you have officially finished your homemade soap recipe and your wonderful winter soap bars are now ready to use or sell! You, your friends, family and customers will love this soap!
I really do hope that you all enjoyed this homemade soap recipe tutorial. We loved making it for you!
Keep in mind that this is definitely an advanced recipe. If you are a beginner soap maker, be sure to browse our soap recipe library for other batch instructions that may be more suitable for a novice. Please enjoy browsing soap-making-resource.com, your home for quality soap making supplies, equipment and tutorials.
Return from homemade soap recipe to the soap recipes hub page.

