Gardener's Soap Recipe
In this picture tutorial, I will be describing my gardener's soap recipe. There are three key components to this type of soap. gardener's soap bars, also known as mechanic's soap bars, should have excellent cleaning properties, be highly exfoliating and offer lots of lather.
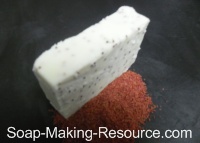
Here is a picture of our finished product in case you are curious!
What exactly do I mean by "excellent cleaning properties"? After all, doesn't all soap clean?
Well... yes. All soap will remove dirt to some degree. Gardener's or mechanic's soap bars should, however, be created with a soap recipe formula that promotes a highly cleansing bar; one that is a lot more cleansing than your standard soap recipe.
As many of you know, all carrier oils will offer different properties within your soap. For example, almond oil, avocado oil and olive oil, when saponified, offer gentle conditioning properties to your product. Coconut oil, palm oil RBD and especially palm kernel oil offer more cleansing properties. Specifically, this means that when one of the latter three oils interact with lye and turn into soap, they literally do a better job at "grabbing onto" dirt particles and removing them from the skin than the first mentioned oils.
Now, of course, you wouldn't want to use a highly cleaning bar on sensitive skin areas, like your face. A gardener's soap bar is harsher than your standard homemade soap because it cleans so well and it is made specifically for use on the hands to remove heavy grime.
A soap that cleans well is great, but if you use a soap that cleans too well on your face, like that produced with my gardener's soap recipe, it will strip your skin of natural, and important, facial oils and cause excessive drying. A gardener's soap bar is to be used specifically on the hands to remove dirt and is not a facial bar. Facial bars typically have a more balanced recipe with lots of conditioning properties.
The key to a successful gardener's soap recipe is a formula that uses a high proportion of palm kernel oil, coconut oil and other oils that cause your soap to clean well. Below, I will explain my exact gardener's soap recipe formula and, of course, we will provide plenty of pictures to help you visualize each step within the tutorial.
Keep in mind that our gardener's soap recipe will make a 5 pound batch of soap and will work perfectly with a Soap Making Resource 5 pound acrylic soap mold or 5 pound wooden soap mold. I hope you enjoy it!
Get the Kit! (Out of Stock)
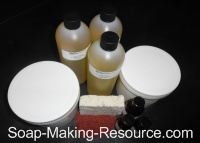
Get our gardener's soap recipe kit and start removing dirt and grime the natural way, starting today! The kit will include 1.5 pounds of palm kernel oil, 1.5 pounds of coconut oil (76 degrees), 16 ounces of olive oil, 16 ounces of avocado oil, 16 ounces of castor oil, 2 ounces of cranberry seeds, 2 ounces of lavender (premium) essential oil, 1 ounce rosemary essential oil and 1 ounce of tea tree essential oil.
The above included products will give you more than enough ingredients to make the 5 pound soap batch as described in the tutorial below plus you will have plenty of left over ingredients for future soap making projects!
The only component that you will have to provide is the lye and distilled water. Lye can be picked up at most local hardware stores and distilled water can be purchased at the grocery store. With your kit, we will also provide you with contact information for my personal lye source, so if you can't find any lye locally, you will know exactly where to get some!
I also encourage you to pick up one of Soap Making Resource's 5 pound acrylic log soap molds or 5 pound wooden soap molds. Either one will work perfectly with this batch!
Furthermore, all soap making kits come complete with full written instructions.
Gardener's Soap Recipe Kit: $60.44 Out of Stock
Keep in mind that all ingredients are also available to purchase in bulk at soap-making-resource.com
Below is my exact gardener's soap recipe formula that we will be using.
- Palm Kernel Oil = 21.2 Ounces (40% of total oils)
- Coconut Oil (76 degrees) = 16 Ounces (30% of total oils)
- Olive Oil (Grade A) = 6.4 Ounces (12% of total oils)
- Avocado Oil = 5.3 Ounces (10% of total oils)
- Castor Oil = 4.2 Ounces (8% of total oils)
- Cranberry Seeds = 8 teaspoons
- Lavender (Premium) Essential Oil = 34 grams (1.1993 Ounces)
- Rosemary Essential Oil = 27 grams (.9524 Ounces)
- Tea Tree Essential Oil = 14 grams (.4938 Ounces)
- Distilled Water = 21 ounces
- lye = 8.318 ounces (235 grams)
*This recipe has a 5% super-fat.
*All measurements are weight measurements, not liquid measurements.
Below is the step by step process for completing my gardener's soap recipe...
Step 1) First, we are going to create our lye solution. Carefully measure out 235 grams of dry lye into a heat and chemical safe container.
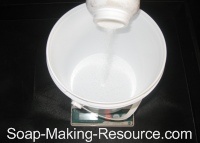
Why exactly are we measuring in grams here? When measuring out any lye portion, we need to be as accurate as possible. Measuring in grams, because it is such a small unit of measurement is a lot more accurate than measuring in ounces. 235 grams is the equivalent of 8.318 ounces. Trust me... you would be very hard pressed to accurately weigh out that specific of a measurement if actually weighing in ounces as most scales will not even calculate to a third decimal!
Next, measure out your distilled water portion into a heat and chemical safe container. We need exactly 21 ounces of water for this batch. Remember, we are measuring in weight ounces here, not liquid ounces.
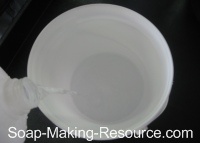
Finally, pour your dry lye portion into your distilled water portion and briefly stir with a heat and chemical safe mixing utensil. It is very important that you always pour the lye into the water and not the water into the lye!
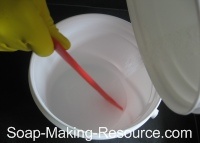
You will notice that as the lye combines with the distilled water, the solution will begin to heat up substantially and a fume will be present. Therefore, be sure to create your lye solution in a well ventilated area and away from children and pets.
Now that your lye solution has been created successfully, place a thermometer into the mixture and set it safely off to the side for future use. Before we can use it, we need this solution to cool down to below 110 degrees Fahrenheit.
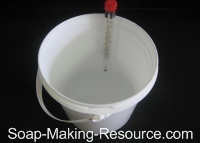
Step 2) Next, we are going to measure out the soap making oils needed for our gardener's soap recipe formula as described above. Measure out the oils into your stainless steel soap making pot.
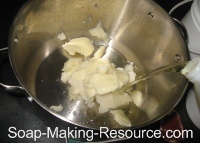
Once the oils are successfully measured out, melt them down using a low heat on your cook top burner. Make sure that you keep the heat very low here as you don't want to burn your soap making oils!
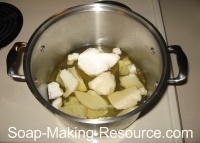
Step 3) While our oils are melting and our lye solution continues to cool, we are going to prepare our additives for this gardener's soap recipe.
First, measure out 8 teaspoons of cranberry seeds.
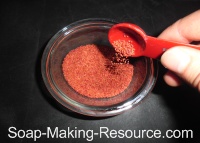
Once they are measured out, place them off to the side for later use. This particular ingredient is going to be added to our batch during a light trace.
Next, we are going to prepare our essential oils for my gardener's soap recipe essential oil blend.
Weigh out in separate containers 34 grams of Soap Making Resource's lavender (premium) essential oil 27 grams of Soap Making Resource's rosemary essential oil and 14 grams of Soap Making Resource's tea tree essential oil.
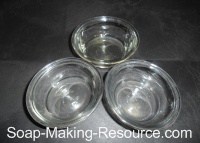
Next, combine all the essential oils into one dish.
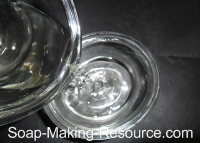
I always like to measure out the essential oils within my blends in separate dishes and then once each oil is successfully measured, combine them into a single container. I do this so that if I accidentally over measure one of the essential oils, I can easily draw some out using a pipette. Obviously, drawing out a specific essential oil would not be possible if we are measuring the essential oils into other essential oils as they would instantly mix together and it would be impossible to rectify any measuring mistakes.
Step 4) While we were preparing our additives, your soap making oils have almost surely melted. If so, remove them from your burner and place a thermometer into the mixture. Our oils should be cooled down to somewhere below 110 degrees Fahrenheit.
|
Sign Up Today!
*Your information is SAFE with us! |
At this point, your lye solution has probably cooled down substantially on its own. The lye solution, just like our oils, should also be below 110 degrees Fahrenheit.
Place your soap making oils and if necessary, your lye solution in a sink filled with ice water to help them cool down to our desired level.
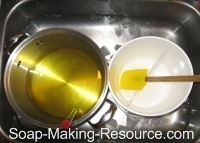
Step 5) At this point, all your additives are prepared to be added to your batch and your lye solution and oils mixture have been cooled to our desired temperature. We are finally ready to make soap!
First, carefully pour your lye solution into your melted soap making oils and stir carefully using a heat and chemical safe mixing utensil.
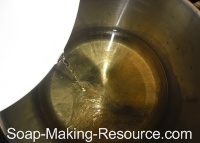
Keep stirring manually for a few moments until you achieve an even color and texture.
Next, begin mixing with your stick blender. Keep on mixing until your soap batch begins to thicken up and you reach a light trace.
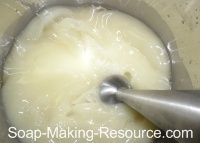
You can test for trace by dribbling a small amount of soap "batter" onto the surface of the rest of your batch. If the dribbled soap sets on top of the larger batch portion, even if just for a second or two, before sinking back into the rest of the mixture, your soap has reached trace! At this point, the consistency of your soap should be that of mayonnaise or a little bit thinner.
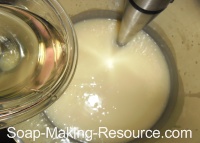
Now, pour in your essential oil blend and stir manually until, once again, you achieve an even color and texture.
Next, dump in your pre-measured cranberry seeds.
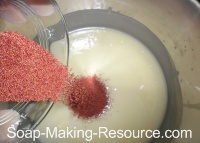
Stir the seeds in manually until they are fully dispersed within your soap.
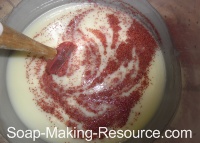
Keep in mind that you need to work quickly here as this gardener's soap recipe's high portion of hard oils will cause the batch to solidify much more quickly than what you may be used to. This is one reason why, once we reached a light trace, we are not using our stick blender to incorporate the additives into this batch.
Too much mixing with a stick blender, especially when working with a gardener's soap recipe like this one with a high portion of solid oils, will only cause your batch to solidify even more quickly. So, I like to only mix this batch manually once you reach a light trace and begin to add your additives. Work as fast as you can as you don't want to go through the notorious "soap on a stick" scenario!
Step 6) Finally, pour your finished batch into your Soap Making Resource 5 pound acrylic log soap mold.
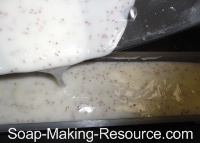
Step 7) Allow your soap to set for about 24 hours or until it is completely solid and able to be removed from the mold without damage. As you can see in the picture below, it is very easy to remove your soap from a Soap Making Resource acrylic log mold. Simply use the included pusher sticks to pop the log right out with minimal handling. A Soap Making Resource acrylic log mold will help you avoid any damage to your finished product when removing your soap.
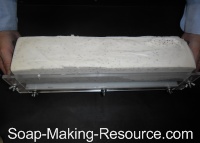
Step 8) Next, cut your soap loaf into bars. As you can see in the picture below, I am using Soap Making Resource's wire soap loaf cutter.
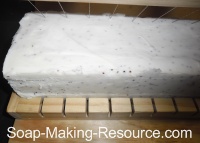
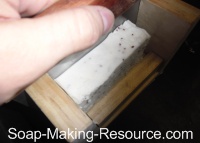
Alternatively, you can use the soap making resource guided soap cutter and slice each bar individually.
Step 9) Now place your cut bars on a rack to cure. You should allow this batch to cure for about 6 - 8 weeks for best results. The longer you allow the soap to cure, the more water will be removed from the product, leaving you with a very hard, long lasting bar with a wonderful lather!
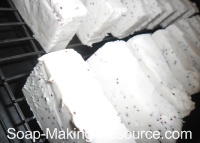
Step 10) Enjoy your gardener's or mechanic's soap bar and start removing grease and grime from your hands the natural way!
I hope that this gardener's soap recipe helps you all! It really is a fun one to try! Of course, all ingredients used within this recipe are available to purchase in bulk right here at soap-making-resource.com.
Alternatively, you can always pick up the kit which will include a small size of all the ingredients needed to complete this batch except for the lye and distilled water. Within each kit, we do provide contact information for my personal lye source, so you won't have to worry about locating this ingredient on your own! Lye is also available in many local hardware stores.
Be sure to check out all the other fun tutorials at soap-making-resource.com!
Return from gardener's soap recipe to the soap recipes hub page.

