Charcoal Soap Recipe
On this page, I will be sharing with you my very own charcoal soap recipe. For this batch I will also be demonstrating a great soap making swirl technique that you can use to design any of your soaps, whether it is a charcoal soap recipe or not! I will tell you; soaps swirled with charcoal look absolutely beautiful as the black and white contrast so well against each other. This charcoal soap recipe will also be scented with a very nice essential oil blend centered around anise essential oil and peppermint essential oil. Keep reading as all with be explained below in this full soap recipe tutorial. Pictures will also be provided with each step. Come on... Let's make charcoal soap!
Our charcoal soap recipe is a 5 pound batch and will work perfectly with Soap Making Resource's 5 pound slab soap mold. For swirling, I find it is best to use a slab mold rather than a log mold because slab molds allow access to more surface area of your soap, making it much easier to create the swirl. You will understand this more fully as you see my demonstration below.
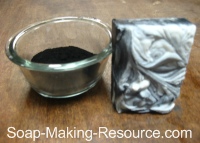
Below is a picture of the finished soap that was produced using this charcoal soap recipe. Isn't it lovely!
Get the Kit! (Out of Stock)
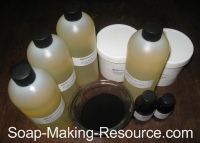
You can now get the charcoal soap recipe as a kit right here at Soap Making Resource. Of course, all ingredients within this recipe are also available to purchase in bulk. Each kit will include 32 ounces of olive oil, 13.5 ounces of coconut oil, 13.5 ounces of palm oil (sustainable source), 16 ounces of avocado oil, 16 ounces of castor oil, 2 ounces of activated charcoal powder, 2 ounces of anise essential oil and 1 ounce of peppermint essential oil. This is more than enough ingredients to complete the charcoal soap recipe as described below! Full written instructions will also be provided with each kit.
This recipe will make 5 pounds of soap and will work perfectly with Soap Making Resource's 5 pound slab soap mold. You may want to pick up our slab mold separately if you don't currently have one.
Charcoal Soap Recipe Kit: $58.19 Out of Stock
* This kit will not come with lye (sodium hydroxide) do to shipping regulations. Within your kit, I will provide you with contact information for my personal source for lye. Depending on where you live, you may be able to buy lye at your local hardware store, so give them a call! Distilled water also will not be provided with your kit as this can be bought at your local grocery store as well.
If you need to make bigger batches, all ingredients within the above kit are also available to purchase in bulk quantities right here at Soap Making Resource!
Below is the exact charcoal soap recipe that we will be using including all the ingredients and proportions:
- Olive Oil = 21.5 Ounces (40% of total oils)
- Coconut Oil (76 Degree) = 10.5 Ounces (20% of total oils)
- Palm Oil (Sustainable Source) = 10.5 Ounces (20% of total oils)
- Avocado Oil = 8 Ounces (15% of total oils)
- Castor Oil = 2.65 ounces (5% of total oils)
- Activated Charcoal Powder = 2 tablespoons
- Anise Essential Oil = 50 grams
- Peppermint Essential Oil = 25 grams
- Distilled Water = 20 ounces
- lye = 7.32 ounces (207 grams)
*This recipe has a 5% super-fat.
*All measurements are weight measurements, not liquid measurements.
Finally, below is the step by step process for making this charcoal soap recipe. Enjoy!
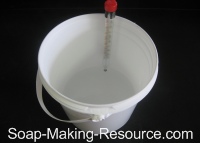
Step 1) First, we are going to create the lye solution for our batch. Measure out 207 grams of dry lye (sodium hydroxide) into your heat and chemical safe container. I use a simple plastic bucket.
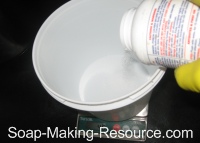
Next, measure out 20 ounces of distilled water. These are weight ounces, not liquid ounces here! Be sure to use distilled water as H2O with impurities can negatively affect the saponification reaction.
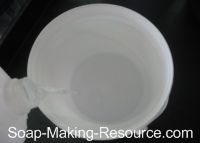
Now that your two components are accurately measured out, combine them. Pour the dry lye into the water; not the water into the lye. This is very important as pouring the water into the lye can potentially create a volcano affect and cause your lye solution to overflow your container and dangerously spill everywhere! Just slowly pour the dry lye into the water and you will be just fine! Don't forget to do this in a well ventilated area as there will be some fumes present.
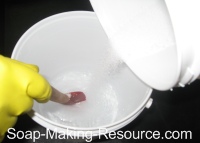
Finally, place a candy thermometer into your newly created lye solution and set it safely off to the side for future use. We want our solution to cool down to around 100 degrees or so for use in our charcoal soap recipe.
Step 2) While the lye solution is cooling, the next step is to measure out and melt down the oils in our recipe. Weigh out each oil in your stainless steel soap pot according to the charcoal soap recipe formula as explained above. Remember, our recipe calls for 21.5 ounces of olive oil, 10.5 ounces of coconut oil, 10.5 ounces of palm oil (sustainable source), 8 ounces of avocado oil and 2.65 ounces of castor oil.
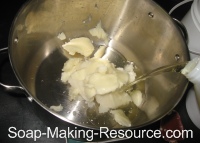
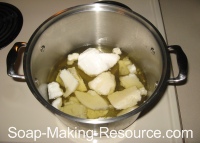
Place your measured out oils on your cook top and melt them on a low heat. Be sure to keep the burner as low as possible so you do not burn the oils!
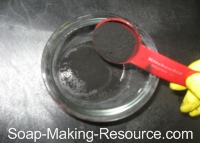
Step 3) Next, we are going to prepare the additives needed for our charcoal soap recipe. First, measure out 2 tablespoons of your Soap Making Resource activated charcoal powder into a container. It is important to do this now, so that when the time comes, the charcoal is ready to be added to the batch.
Next, weigh out your essential oils. For today's blend, we will be blending 50 grams of anise essential oil and 25 grams of peppermint essential oil. This spicy and minty essential oil blend is one of my favorite 2 oil combinations. You will love it, and I really think the scent fits the black and white color produced by our charcoal soap recipe. I always recommend that you measure out your essential oils in separate bowls and then combine them together. This way, if you accidentally over-measure, you will be able to remove the excess essential oil from its bowl. This obviously would not be possible if you were combining them together as you are measuring.
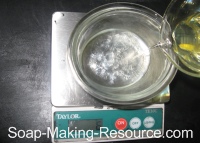
By the way, why are we measuring in grams here? Well, I think it is a bit too difficult to accurately measure such a small amount of product using ounces. For instance, 50 grams of anise essential oil equates to 1.763698099034336 ounces. I don't know of any scale that would measure to such an extreme decimal! When you want to measure accurately, measure in grams. With essential oil blends, I want to be as accurate as possible so I can perfectly duplicate the scent if I need to make another batch.
Step 4) While you were measuring out your activated charcoal powder and preparing your essential oil blend, your oils have probably completely melted. Next, we need to lower the temperature of our oils to around 100 degrees. I like to speed up this process by placing my hot oils in a sink filled with ice water. At this point, if your lye solution is still too warm, you can place it in the ice water as well.
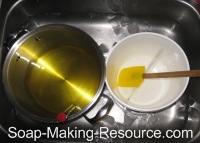
Step 5) At this point, our additives are prepared, our oils are melted and both the oils and lye solution are cooled to around 100 degrees. We are finally ready to make soap!
|
Sign Up Today!
*Your information is SAFE with us! |
To complete your charcoal soap recipe, first pour your lye solution into the soap making oils. Stir manually at first for a few minutes until your batch is an even color and texture. Don't use your stick blender just yet!
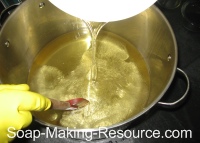
It is very important for this charcoal soap recipe that you do not let the soap get too thick too quickly. We have a lot of steps to complete for this batch and need as much time as possible to complete them. Also, ingredients like charcoal will thicken up your soap very quickly, so we want to keep the soap somewhat thin before including this additive.
Once your soap is an even color and texture, add your anise and peppermint essential oil blend and mix it in manually, again, until you have an even color and texture.
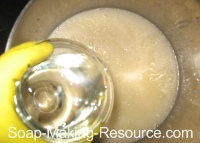
At this point, you can use your stick blender. Blend until you reach a thin trace.
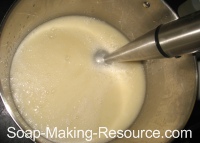
Although you want your soap to be somewhat thin... like the consistency of a thin pudding, make sure that you have reached a true trace. Keep in mind that once you separate the batch and create your swirl, you will not be able to blend anymore as this would ruin the swirl! Your soap must be at a full trace before you swirl your soap!
You can test for trace by dribbling a small amount of soap "batter" onto the surface of your main batch. If it sits on the surface of your soap for a few seconds before sinking back down into the rest of the mixture, your charcoal soap recipe has then reached trace!
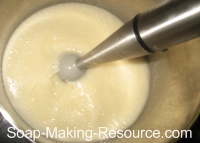
Now that your soap has reached a thin trace, separate half of the charcoal soap recipe batch into a separate container. Although you can probably estimate this by eye, I like to actually measure out half the batch with my scale. Remember, this is a 5 pound batch of soap, so transfer 2.5 pounds into your separate container.
As you can see below, I am using a simple plastic bucket. Whatever vessel you decide to transfer your soap into, make sure that it can withstand the caustic properties of your newly created soap!
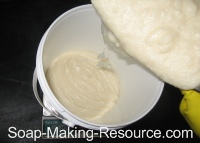
Next, we are going to add our pre-measured activated charcoal powder to just one of our soap portions. As you can see below, I decided to add it to the soap in the plastic bucket.
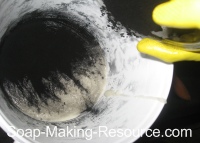
Now, mix the charcoal thoroughly into your soap. Make sure you mix it in completely, but don't let it get too thick by stirring for too long! For our swirling technique, it really helps if both soap portions are very thin and pourable. Mix manually at first, but don't be afraid to give the soap a few blasts with your stick blender if you are having a hard time mixing the charcoal in thoroughly.
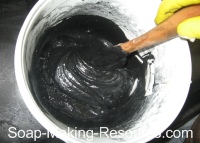
At this stage, your soap may look more gray than black. Don't worry, this is perfectly normal. After your soap cures, trust me, it will be black as night!
Now that the charcoal is thoroughly combined with the single portion of soap, it is time to combine the white portion with the black portion and create our swirl.
There are many different wonderful soap swirl techniques out there. For our method, we will be doing an in the mold swirl.
Take one portion of soap and pour a thin layer into your mold. Make sure that this is just a thin layer, using only enough to lightly cover the bottom of your mold. You can start with either the white or black soap.
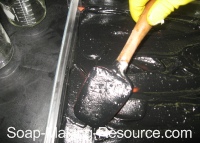
You can now see why it is so important to make sure that your soap is not too viscous. When the soap is somewhat thin, it will more easily spread to all corners.
Now, pour another layer of soap of the opposite color on top of the first layer. Again, don't pour too much. The swirl comes out beautifully when you keep each layer relatively thin.
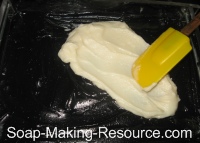
Keep repeating this process, alternating soap colors until all of your charcoal soap recipe soap is in the mold.
Next, we are going to combine the layers and create our swirl. Take chopsticks, a wooden skewer or any type of thin stick-like utensil and place it into your soap in one corner of the mold. Be sure to use a utensil that can withstand the harsh properties of your newly created soap.
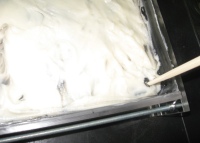
Next, in a diagonal pattern, combine all layers of soap with your swirling tool going from the mold corner you started in to the opposite corner of the mold. With this technique, you are literally dragging all layers together using your utensil. If you wish, you can also pull the soap up a bit using your swirling tool to combine the layers vertically as well as horizontally. Be sure that your utensil is lightly touching the bottom of your mold so that you know you are penetrating all layers. Repeat this process, but now go the opposite way, against your initial swirl from the other corner of the mold to the final untouched corner.
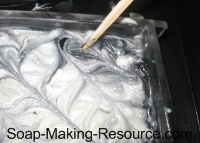
Use your imagination when swirling! Keep in mind that no two swirl soaps will ever look the same! Swirling is more of an art form than a science and you will eventually develop your own preferred style. One word of advice: Don't try to swirl your soap too much as eventually all the layers will combine and you will be left with a single colored soap. You want the contrasting colors in your swirl to be somewhat defined, so don't go overboard!
Step 6) Finished swirling? At this point, we are completely finished with our charcoal soap recipe! If you are using the Soap Making Resource slab soap mold, insert your dividers into the mold. The dividers will help pull the swirl down giving the sides of your bars a very appealing finished look.
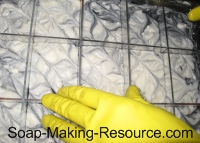
Step 7) After about 12 to 24 hours, your soap will be solid enough to remove from the mold. I know it's difficult to withstand the suspense! I must say, it's so exciting, especially when swirling, to take your soap out of the mold and reveal its final design. You can see me below removing the now hardened soap from the Soap Making Resource acrylic slab soap mold.
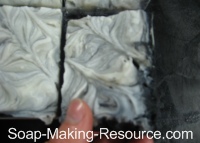
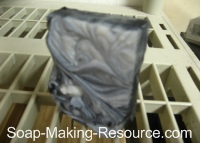
Step 8) Finally, set each bar produced with this charcoal soap recipe on a rack to cure. After a few weeks, your soap will be very hard and ready for use!
I hope you all enjoyed this charcoal soap recipe as much as I enjoyed creating it for you all! Remember, this recipe is available in a kit or you can always pick up all the ingredients individually, right here at soap-making-resource.com.
If you have any questions, feel free to visit the Soap Making Resource's talk soap forum. Post your pictures from this recipe in the gallery section of the forum if you get a chance! I, along with everyone else in our community, would love to see how your charcoal swirl turned out!
Return from charcoal soap recipe to the soap recipes hub page.

